-
Research
We spent two months researching astronaut experiences and other analogous domains. Through interviews with retired astronauts and a literature review, we isolated the important characteristics of an astronaut’s experience. We used these to compare against different domains that we could actually observe on Earth. Altogether we performed twenty interviews, four contextual inquiries, and participated in three experiential learning opportunities. We also performed a literature review, current technology review, and two low fidelity experiments.

Getting hands-on experience with the Rodent Habitat
-
Research Analysis
After completing our preliminary research, we spent one month analyzing the data. We created 12 sequence models and 11 flow models to display the procedural and interpersonal information that we gathered from the domains. Then, we organized our thousands of notes into an affinity diagram to find the patterns in the data. From all of these notes we distilled four main insights, which we presented to NASA in May.
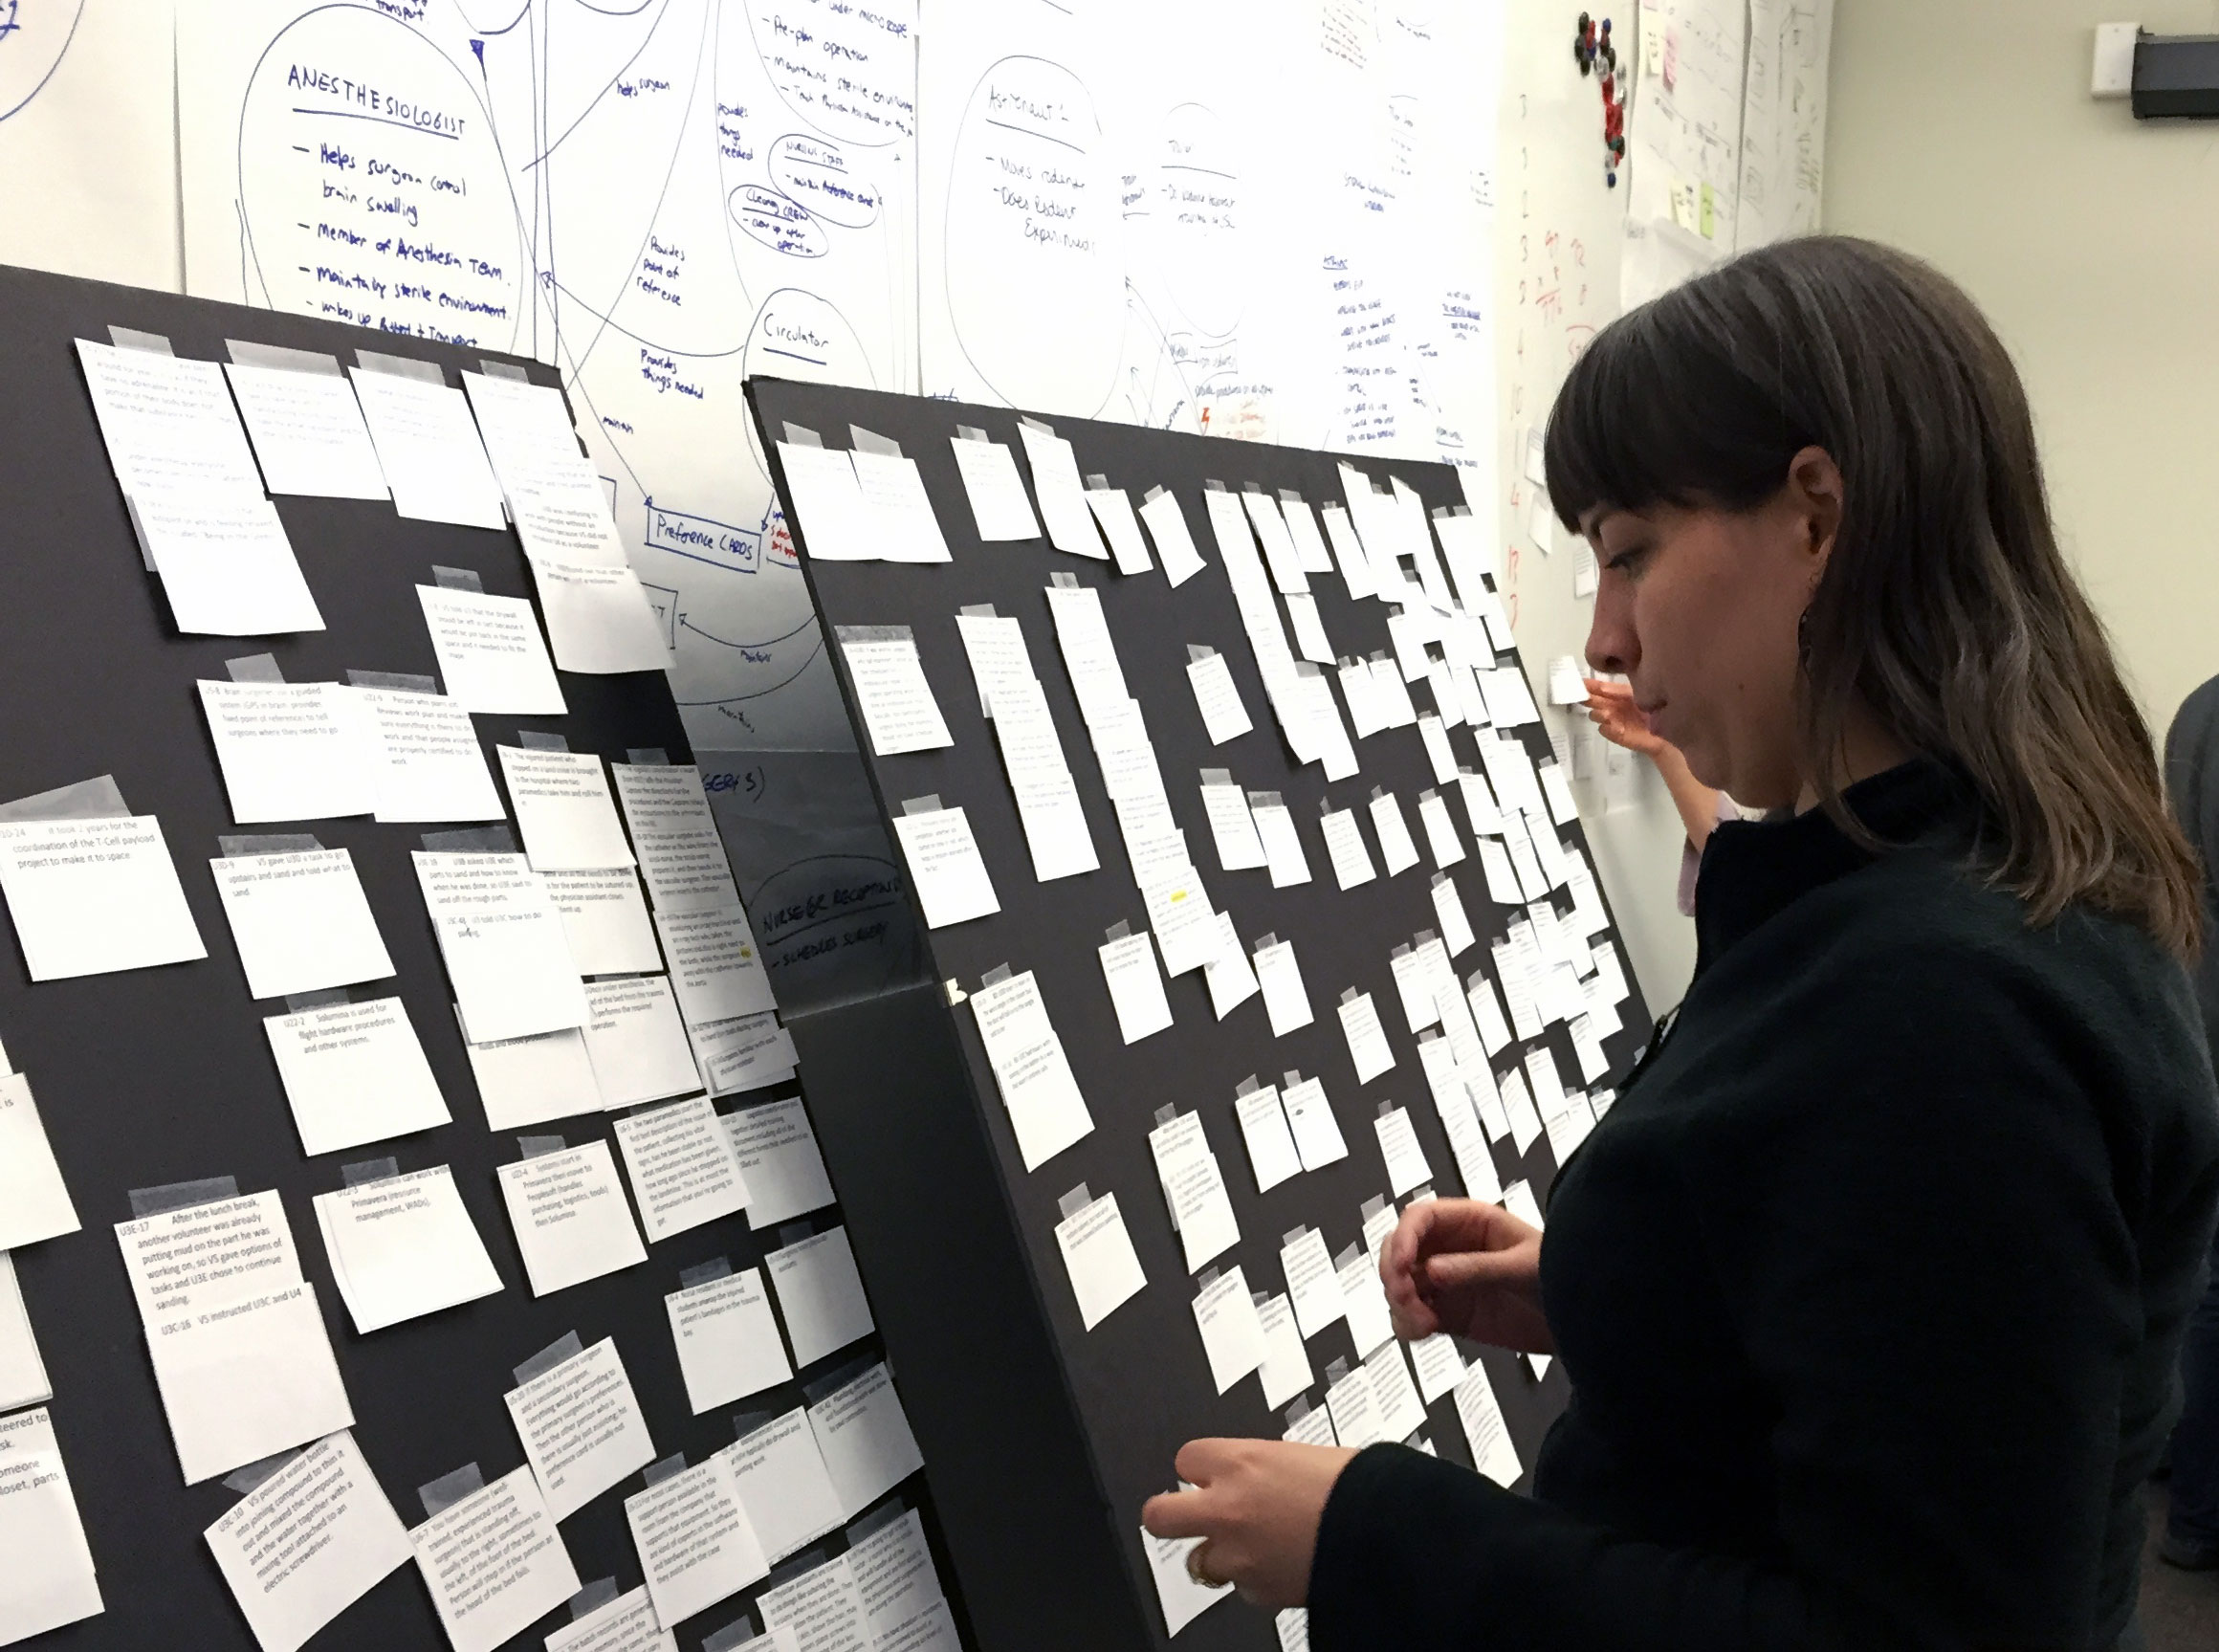
Pulling together the data with our affinity diagram
-
Visioning
After presenting our insights, I led a visioning session in which our team and members of the HCI team from NASA bodystormed (brainstormed by physically acting out situations) solution ideas based on prompts derived from our insights. As a result, we narrowed our options down to four design directions. We made this decision based on the ideas’ feasibility, impact level for astronauts, and excitability factors, since our final product will be used to demonstrate the possibilities of future technology for NASA.
These discussions led us to decide to focus on clarifying instructions with the help of the Internet of Things. Within this concept we intended to use sensors on tools to determine their current location, use sensors to allow for self-referential directions in procedure documents, and to explore different methods for improving spatial navigation and cognitive orientation.
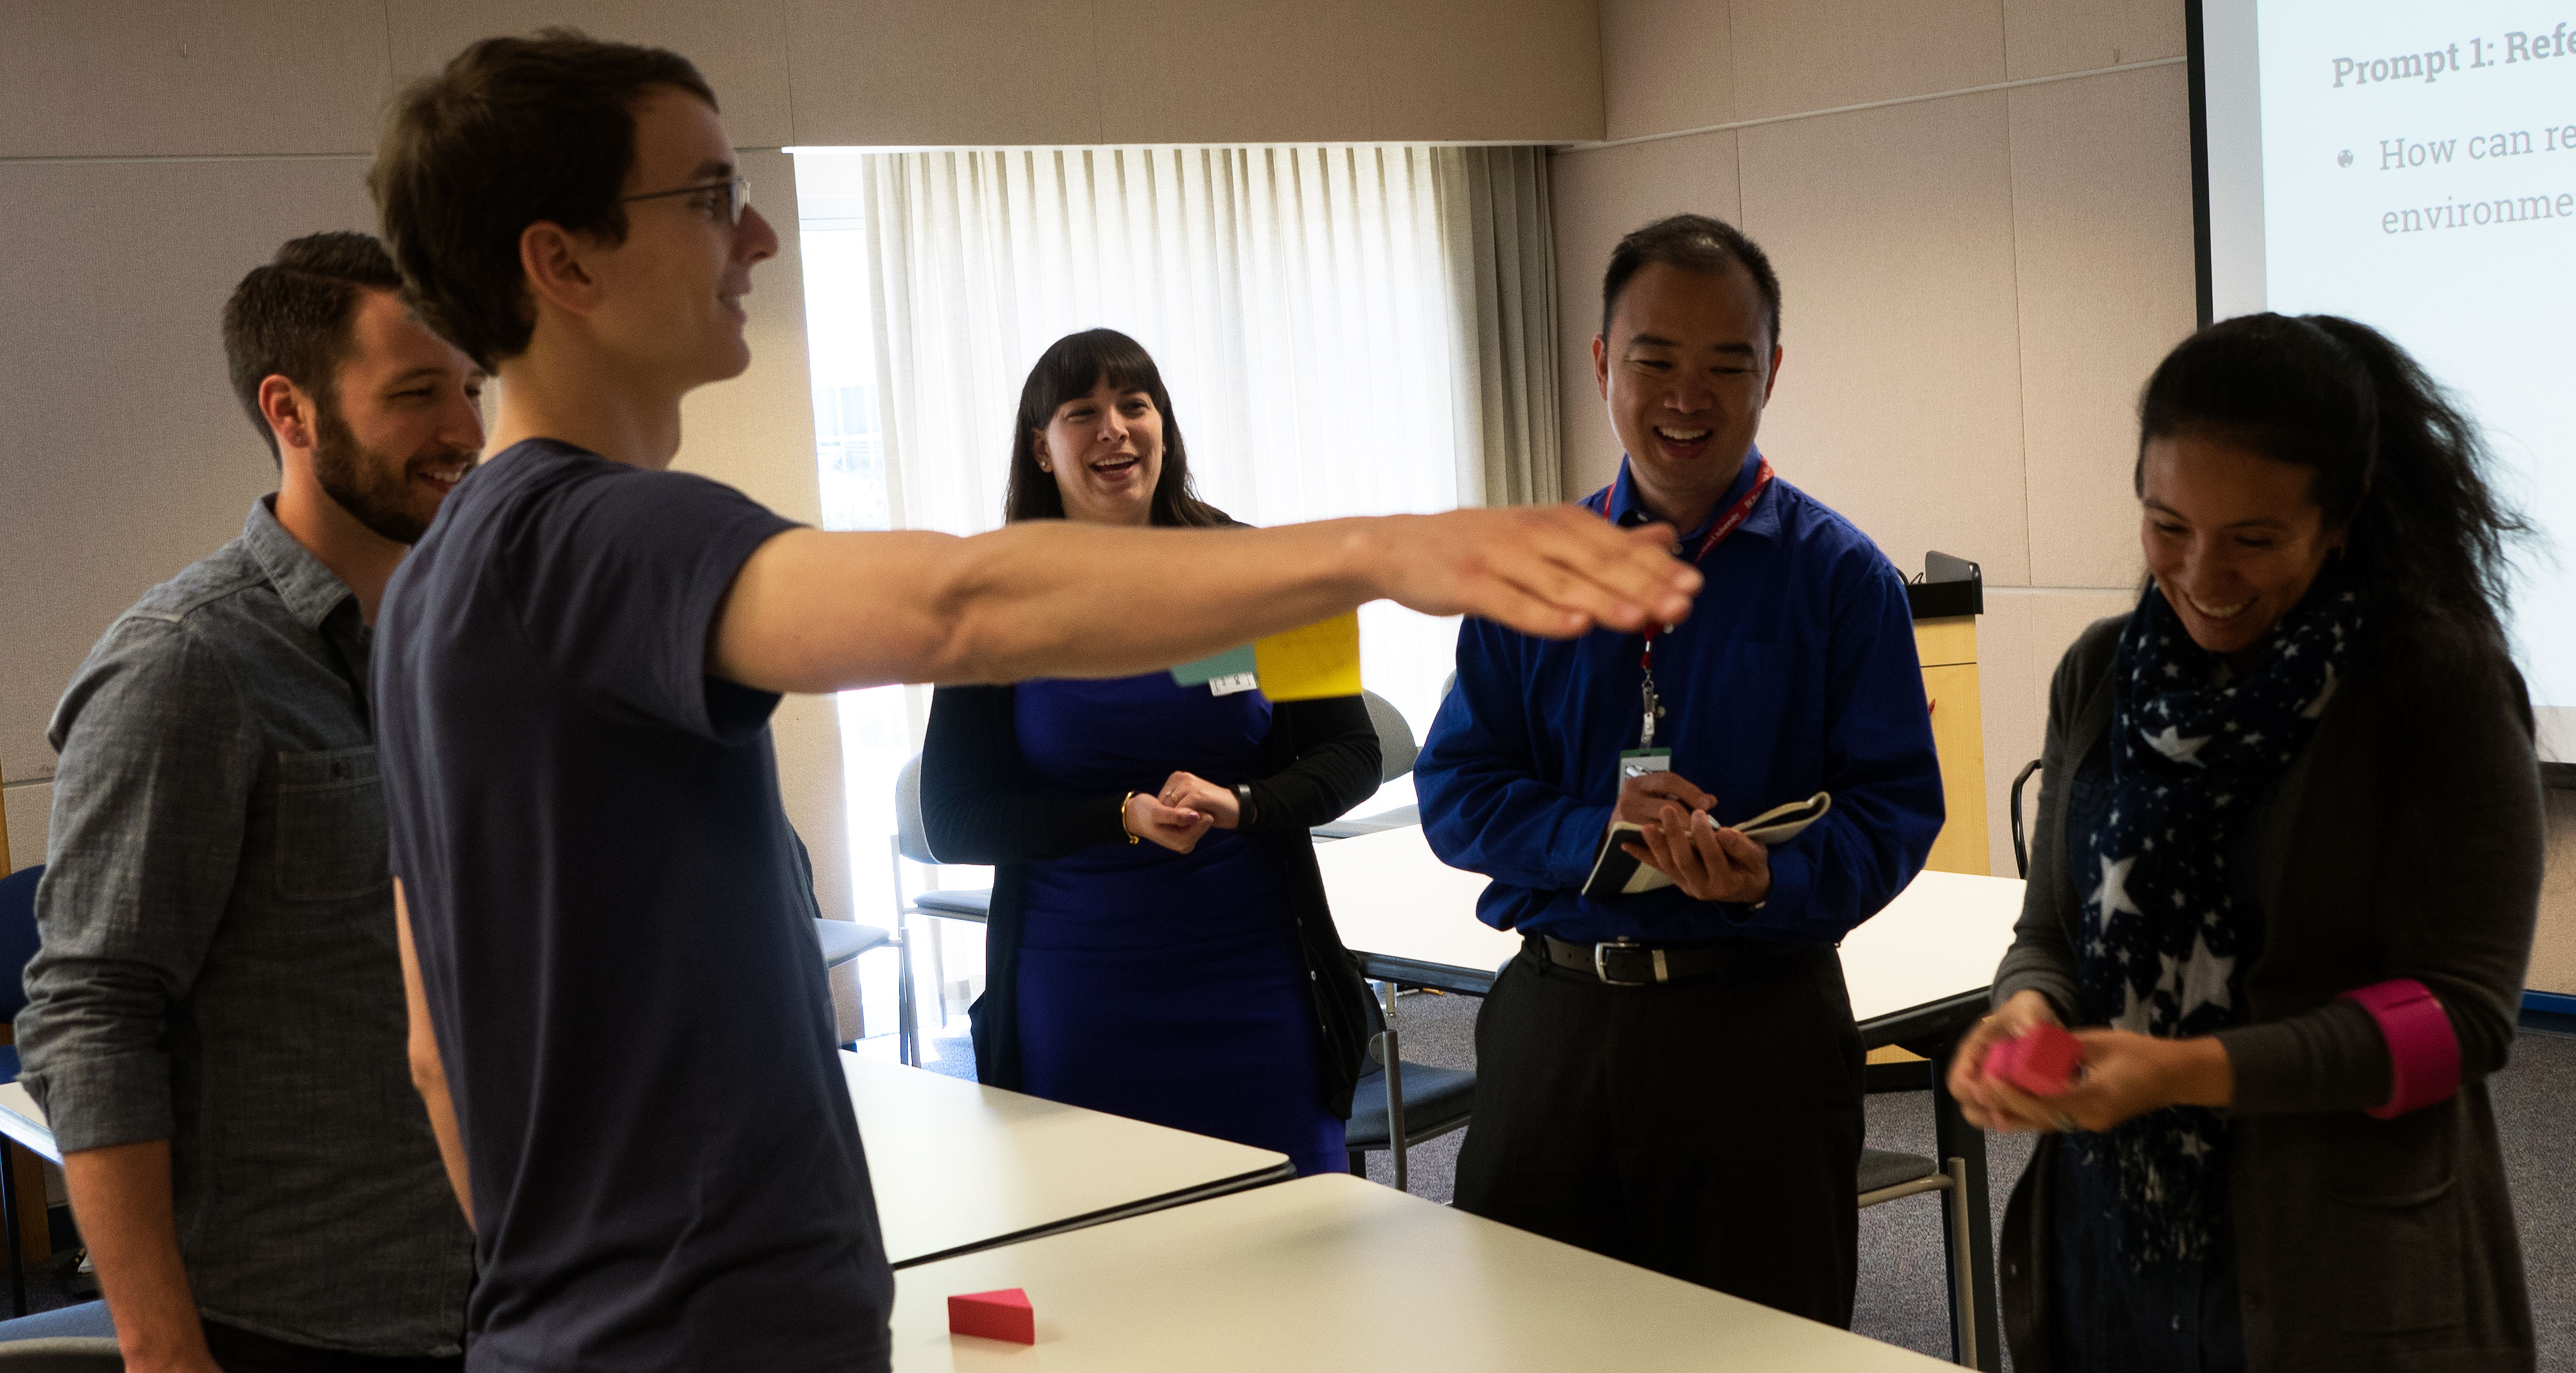
Visioning session with the NASA HCI team
-
Low Fidelity Prototypes
We created three low fidelity prototypes to test our theories on ways to track cognitive status through a procedure and provide guidance to the location of tools. In each prototype we explored a different platform: augmented reality goggles, wearables with audio instructions, and a tablet.
We used our prototypes to walk participants through a simple, but unfamiliar cooking procedure. These usability tests taught us more about optimal cognitive and spatial orientation styles, let us explore potential platforms, and highlighted several areas for improvement for our product development.

Augmented Reality Prototype

Wearable and Audio Prototype
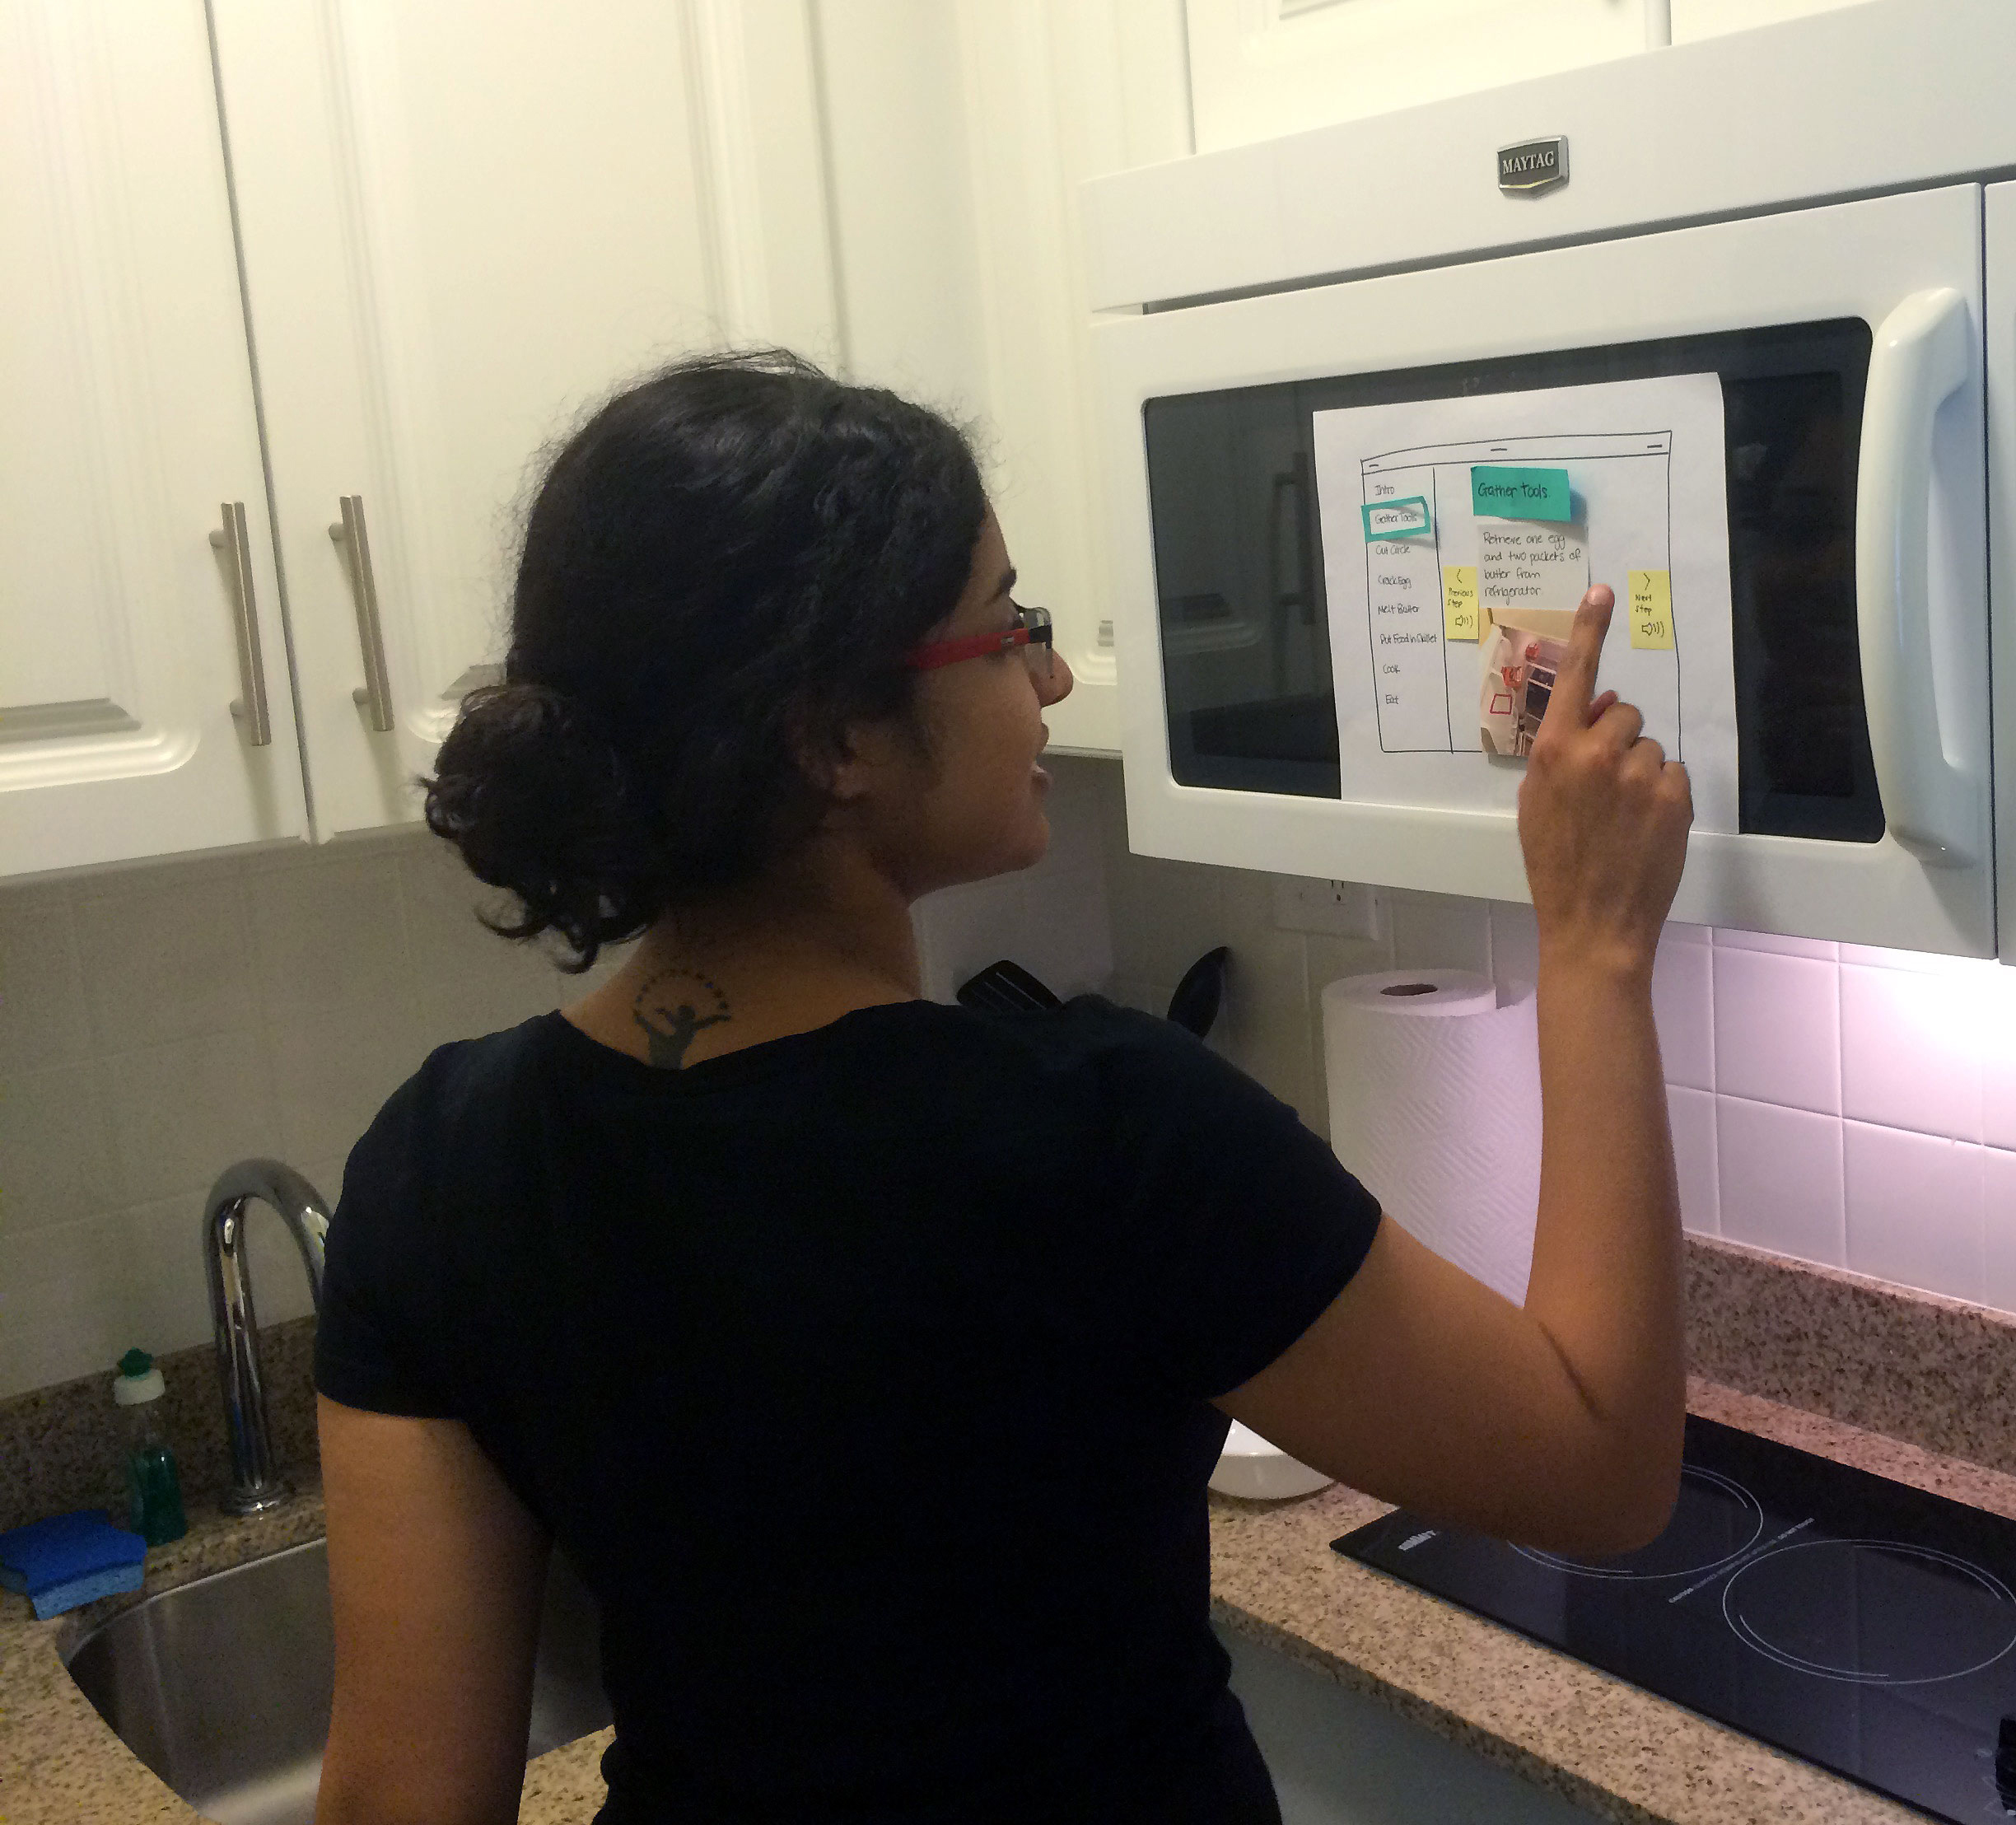
Tablet Prototype
-
Medium Fidelity Prototype
For the medium fidelity prototype, we changed our focus to one of the NASA procedures from the Rodent Habitat, a recurring science experiment on the ISS. During this procedure, the astronaut is often up to her elbows in protective equipment in a containment unit. This constraint led us to move forward with an augmented reality platform that left the users’ hands free to complete the task while still including a scannable, visual interface.
After returning from the Augmented World Expo, we determined that currently retailed augmented reality glasses are expensive and do not have enough capabilities yet to realize our goals. Since our initial prompt told us to consider technology available within five to ten years in the future, we decided to build our own mocked-up version of AR glasses for our medium and high fidelity prototypes instead.
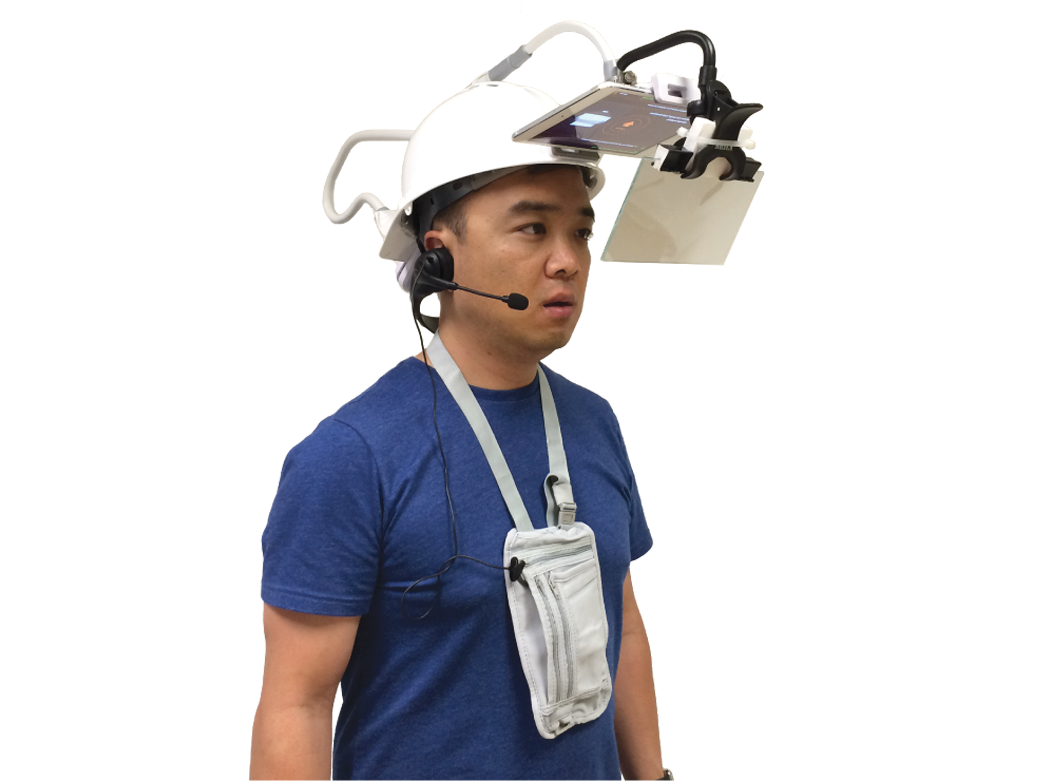
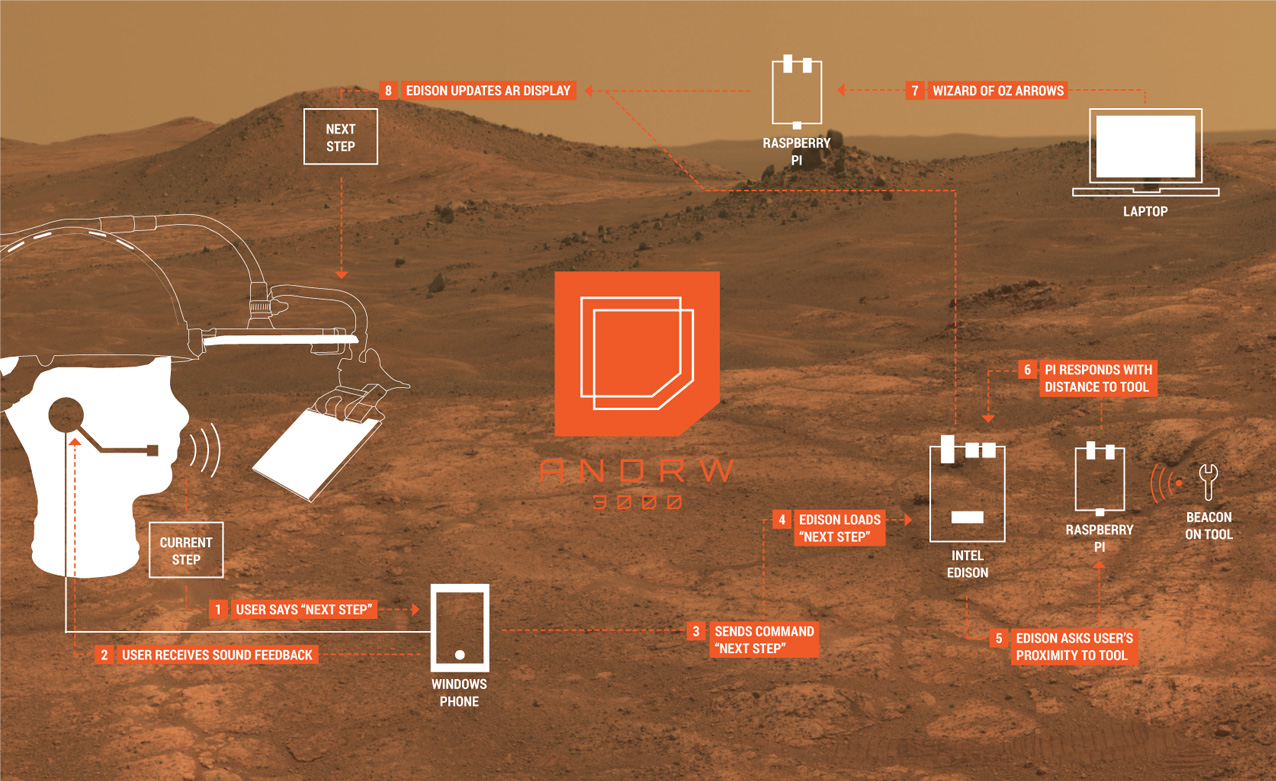
The medium fidelity prototype was a simulation of augmented reality in the form of a cell phone attached to a helmet, serving as a heads-up display. The mid-fidelity prototype included a set of slides based in a web browser that was shown on a phone. The phone was mounted on a bike helmet so that the participant was able to see it within the top of their vision, but also able to view the environment below it. To control the interface, the participants spoke verbal commands that we implemented using Wizard of Oz techniques. We also controlled directional arrows to lead the participants to tools during the setup section of the procedure.
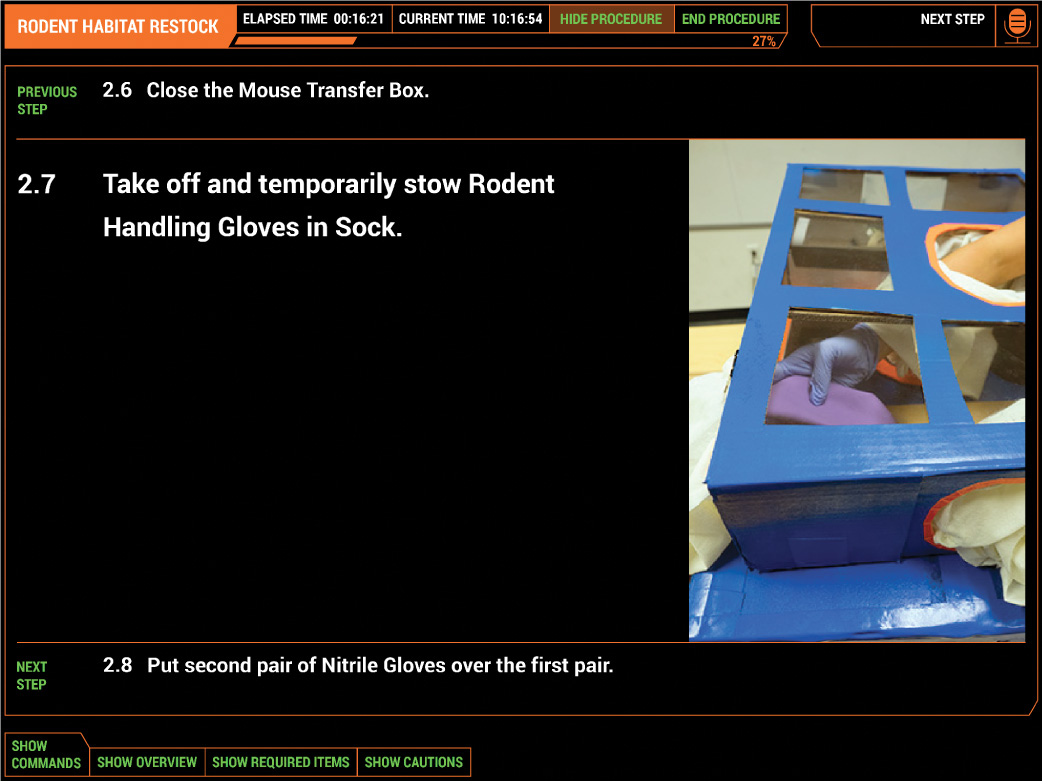
The usability tests for this prototype suggested that we were moving in the correct direction by using responsive directional arrows, affordances to assist verbal command usage, and various elements to improve cognitive orientation such as a ratio-based progress bar showing both step and rough timing estimations, a task overview, and supplemental images to help clarify instructions.
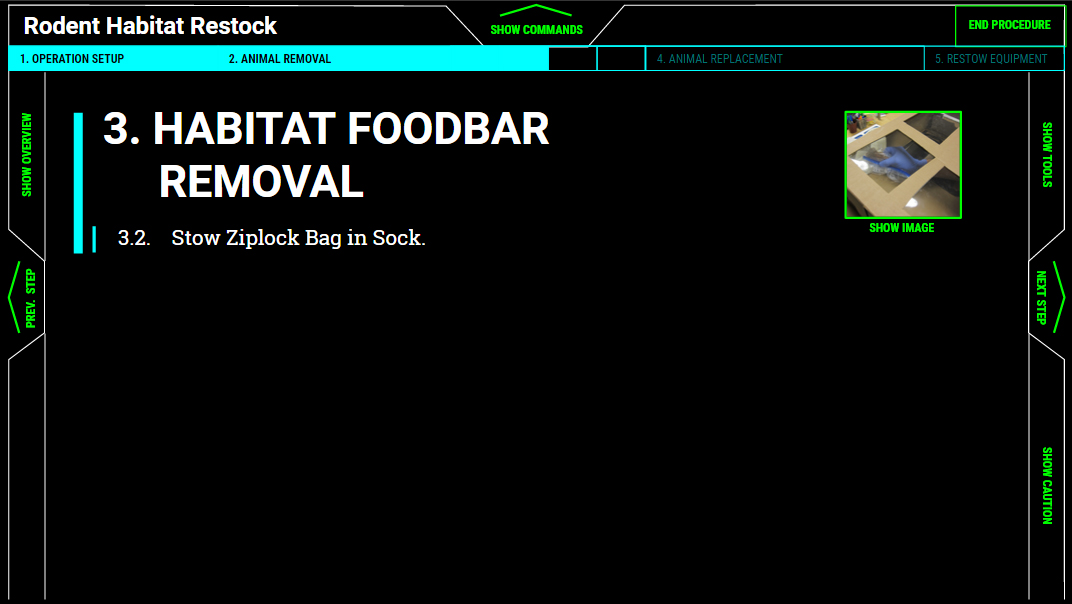
Example of an interface screen
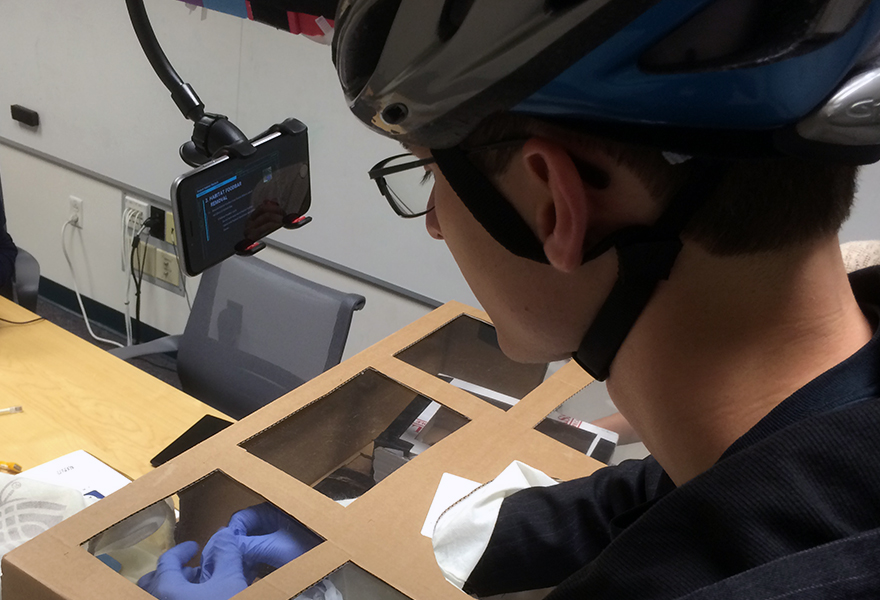
Our prototype in action
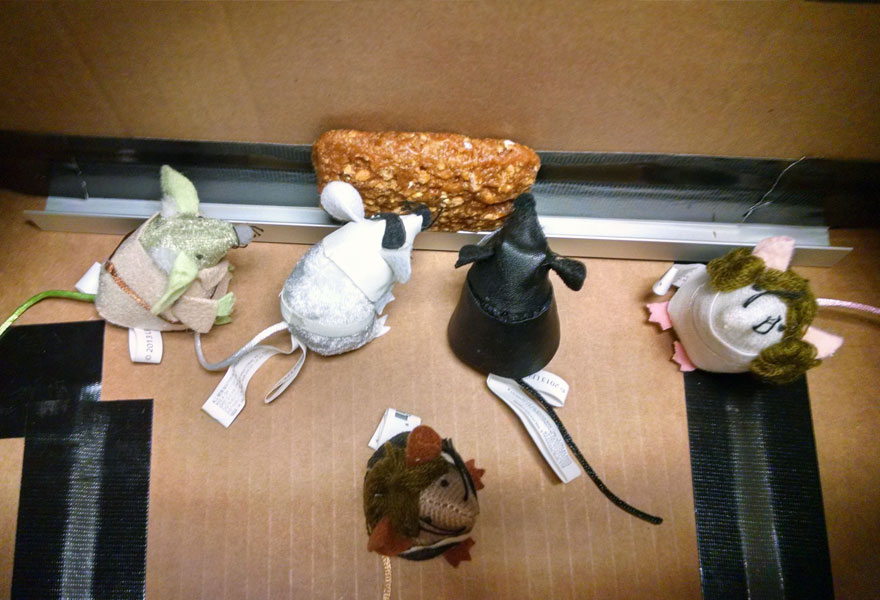
A quick view inside the Rodent Habitat
-
High Fidelity Prototype
For our high fidelity testing, we created a more technologically advanced prototype using a transparent interface, speech recognition, and beacon technology. All interactions with the interface were automated except for the navigational arrows to tools used in the task since the beacon technology was not as robust as we had originally anticipated. Instead of using the beacons to fully automate the locating process, we were only able to use the data from the beacons to automate an indication of when the participant was within 1 meter of the beacon’s location.
Along with the technology, we upgraded the device training, procedure document, task materials, user interface, voice commands, and the physical device. The new interface was displayed as a reflection on a piece of teleprompter glass which was produced by a iPad mini (with a flipped image) from above. We traded in the bicycle helmet for a construction helmet with counter weights in the back for a more stable and comfortable physical experience. The boxes used for the Rodent Habitat were painted and reinforced to better imitate the real equipment and last through future NASA demonstrations after the project was completed. The improvements to the device training and procedure documents helped reduce confusion and the time that it took participants to complete the task.
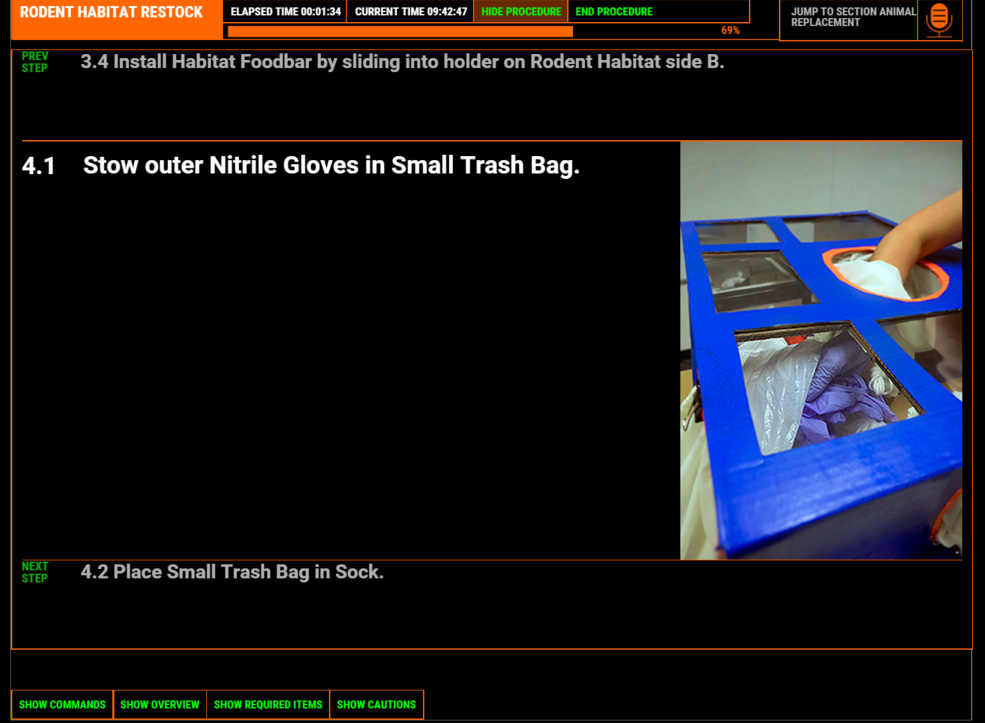
Example of an interface screen

Close-up of the updated physical prototype

User testing with the new equipment
